Configure Swapping Information in Components
Contents
Parent page: PinSwapper Dialogs
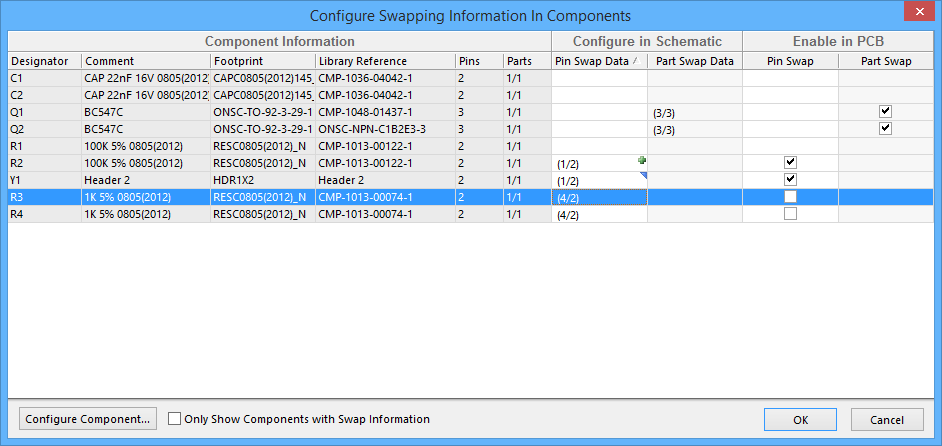
Example list of components and relevant information within the Configure Swapping Information In Components dialog
Summary
The Configure Swapping Information in Components dialog lists all components used in the design with their current swap settings. From this dialog you can also access the Pin Swapping for Component dialog whose additional columns allow you to enable/disable swapping for each component on the board.
Access
The Configure Swapping Information in Components dialog is accessed in the following ways:
- From the Schematic editor by clicking Tools | Swapping | Configure Pin Swapping.
- From the PCB editor by clicking Tools | Swapping | Pin/Part Swapping » Configure.
Options/Controls
Component Information
Displays all relevant information about the listed components: designator, comment, footprint, library reference, number of pins, and number of parts.
Configure in Schematic
-
Pin Swap Data - displays how many of the component's pins have been added to a pin-swap group. For example, [3/2] means that 2 out of 3 pins have been added to a pin-swap group. The
 icon appears when a component has been modified to add pins to a pin-swap group. When a component has been modified to remove pins from the pin-swap group, the icon appears.
 -
Part Swap Data - displays how many of the component's parts have been added to a part-swap group. For example, [3/2] means that 2 out of 3 parts have been added to a part-swap group. The
icon appears when a component has been modified to add parts to a part-swap group. When a component has been modified to remove parts from the part-swap group, the icon appears.
Enable in PCB
- Pin Swap - Enable or disable pin swapping for each component by checking the box . The swap will take effect once you click OK and exit the dialog.
- Part Swap - Enable or disable part swapping for each component by checking the box . The swap will take effect once you click OK and exit the dialog.
Configure Component
Click to open the Configure Pin Swapping for Component dialog. Enable the Only Show Components with Swap Information option to prevent the dialog from displaying components that have not been configured to enable pin and/or part swapping.
Right-Click Menu
The dialog includes a powerful right-click menu, making it easy to quickly copy and paste the settings from one component to another, or enable/disable multiple components in a single click. Select Configure Component from the right-click menu to open the Pin Swapping for Component dialog for that component, where you can define the swap group settings for pins, differential pairs, and subparts. Double-clicking on the component will also open the Pin Swapping for Component dialog.