Sheet Symbol
Contents
Parent page: Schematic Objects
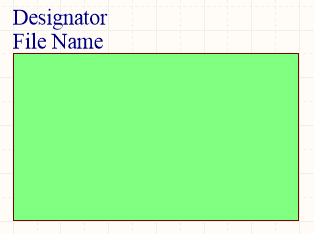
A placed Sheet Symbol
Summary
A sheet symbol is an electrical design primitive. It is used to represent a sub-sheet in a multi-sheet hierarchical design. Sheet symbols include sheet entry symbols, which provide a connection point for signals between the parent and child sheets, similar to the way that Ports provide connections between sheets in a flat-sheet design.
Availability
Sheet Symbols are available for placement in the Schematic Editor only by clicking Home | Circuit Elements | ![]() from the main menus.
from the main menus.
Placement
After launching the command, the cursor will change to a cross-hair and you will enter sheet symbol placement mode. Placement is made by performing the following sequence of actions:
- Click or press Enter to anchor the first corner of the sheet symbol.
- Move the cursor to adjust the size of the sheet symbol then click or press Enter to complete placement.
- Continue placing further sheet symbols, or right-click or press Esc to exit placement mode.
Additional actions that can be performed during placement – while the sheet symbol is still floating on the cursor, and before its first corner is anchored – are:
- Press the Tab key to access an associated properties dialog, from where properties for the sheet symbol can be changed on-the-fly.
- Press the Alt key to constrain the direction of movement to the horizontal or vertical axis, depending on the initial direction of movement.
- Press the Spacebar to rotate the sheet symbol counterclockwise or Shift+Spacebar for clockwise rotation. Rotation is in increments of 90°.
- Press the X or Y keys to mirror the sheet symbol along the X-axis or Y-axis respectively.
Graphical Editing
This method of editing allows you to select a placed sheet symbol object directly in the workspace and change its size, shape or location, graphically.
When a sheet symbol object is selected, the following editing handles are available:
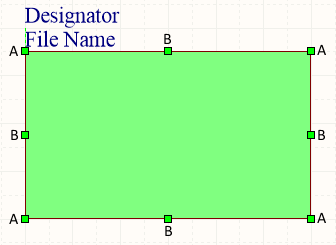
A selected Sheet Symbol
- Click and drag A to resize the sheet symbol in the vertical and horizontal directions simultaneously.
- Click and drag B to resize the sheet symbol in the vertical and horizontal directions separately.
- Click anywhere on the sheet symbol – away from editing handles – and drag to reposition it. While dragging, the sheet symbol can be rotated (Spacebar/Shift+Spacebar) or mirrored (X or Y keys to mirror along the X-axis or Y-axis respectively).
The sheet symbol's Designator and Filename text fields can only be adjusted with respect to their size by changing the size of the font used (accessed through the Sheet Symbol Designator and Sheet Symbol File Name dialogs, respectively). As such, editing handles are not available when either of these objects are selected.
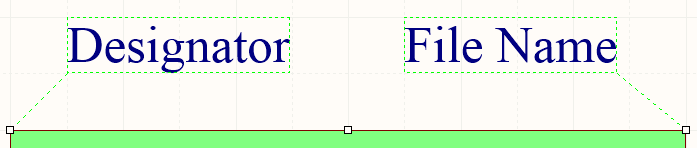
Selected Designator and Filename for a sheet symbol
- Click anywhere inside the dashed box and drag to reposition the text object as required. While dragging, the text can be rotated (Spacebar/Shift+Spacebar) or mirrored (X or Y keys to mirror along the X-axis or Y-axis respectively).
- The text for an object can be edited in-place by:
- Single-clicking the designator or filename text to select it.
- Single-clicking again (or pressing the Enter key) to enter the in-place editing mode. Sufficient time between each click should be given to ensure the software does not interpret the two single-clicks as one double-click (which would open the associated properties dialog).
- To finish editing in-place text, press the Enter key, or use the mouse to click away from the text object.
Non-Graphical Editing
The following methods of non-graphical editing are available:
Via an Associated Properties Dialog
Dialog page: Sheet Symbol
This method of editing uses the Sheet Symbol dialog to modify the properties of a sheet symbol object.
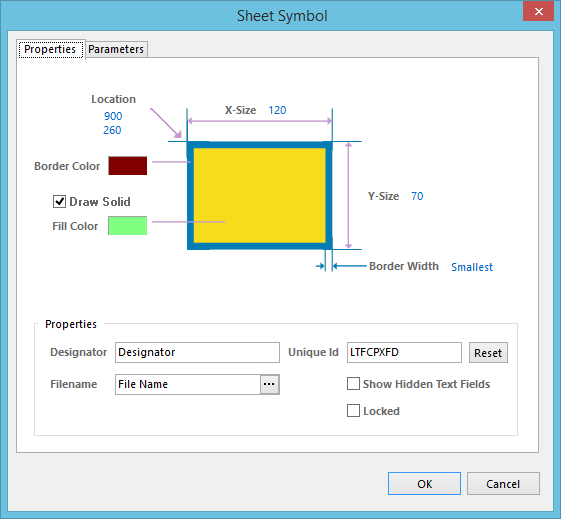
The Sheet Symbol dialog
The dialog can be accessed during placement by pressing the Tab key.
After placement, the dialog can be accessed in one of the following ways:
- Double-click on the placed sheet symbol object.
- Place the cursor over the sheet symbol object, right-click then choose Properties from the context menu.
The sheet symbol Designator and Filename text fields can be formatted independently of the sheet symbol itself. The corresponding properties dialogs for each - the Sheet Symbol Designator and Sheet Symbol File Name dialogs - can be accessed using the after-placement methods described above (replacing sheet symbol with the relevant object whose properties you want to view/modify).
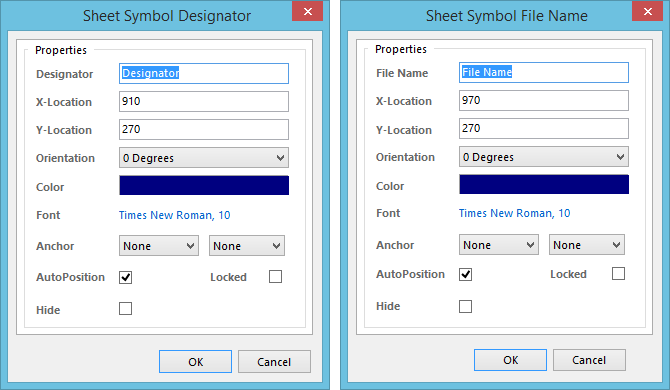
The Sheet Symbol Designator and Sheet Symbol File Name dialogs
Via an Inspector Panel
Panel pages: SCH Inspector, SCHLIB Inspector
An Inspector panel enables you to interrogate and edit the properties of one or more design objects in the active document.
Sheet Symbol Actions
Right-clicking over a placed sheet symbol will pop-up a context-sensitive menu, from which the following commands are available (on the Sheet Symbol Actions sub-menu) that act on that sheet symbol (or all currently selected sheet symbols, where applicable):
- Open SubSheet "<SheetName.SchDoc>" - use this command to access the child sheet referenced by the symbol, which will be opened (if not already) and made the active document in the main design window.
- Create Sheet From Sheet Symbol - use this command to create a new schematic document from the sheet symbol and add ports to that document corresponding to each of the sheet entries on the symbol. In this way, you can automatically create the sub-sheets for a multi-sheet schematic design based on the sheet symbols you have created and placed on the top sheet.
- Rename Child Sheet - use this command to quickly rename the child schematic sheet referenced by the sheet symbol. The Rename Child Sheet dialog will open in which you can specify the new name for the document as required, as well as the scope of the renaming action.
- Synchronize Sheet Entries and Ports - use this command to synchronize the sheet entries and sub-sheet ports for the sheet symbol. The Synchronize Ports To Sheet Entries dialog will open. Use this dialog to ensure that all sheet entries on the sheet symbol are matched to ports on the referenced child sheet below, both in terms of name and I/O Type.
- Flip Sheet Symbol Along X - use this command to flip the sheet symbol along the X-axis. The sheet entries associated with the symbol will essentially be swapped to the opposite side of the symbol (in the horizontal plane) - those on the left will be repositioned on the right and vice-versa.

Example of flipping a sheet symbol along the X-axis.
- Flip Sheet Symbol Along Y - use this command to flip the sheet symbol along the Y-axis. The sheet entries associated with the symbol will essentially be swapped to the opposite side of the symbol (in the vertical plane) - those at the top will be repositioned at the bottom and vice-versa.
Example of flipping a sheet symbol along the Y-axis.
- Toggle All Sheet Entries IO Type in Sheet Symbol - use this command to toggle the I/O Type for all sheet entries in the sheet symbol, simultaneously, and where applicable.
Example result of toggling sheet entry IO.
The actual change depends on the current I/O Type as follows:
- Unspecified remains Unspecified
- Output changes to Input
- Input changes to Output
- Bidirectional remains Bidirectional.
Notes
- If a group of sheet entries is pasted into a selected sheet symbol and those entries fall outside the current bounds of the symbol, it will automatically be resized to accommodate them.
- By using sheet symbol instantiation, multiple channels on the same sub-sheet can be referenced from a single sheet symbol. The syntax used involves the use of the Repeat keyword in the sheet symbol's Designator field and takes the form:
Repeat(SheetSymbolDesignator, FirstInstance, LastInstance),
where SheetSymbolDesignator is the base name for the sheet symbol and FirstInstance and LastInstance together define the number of channels to be instantiated. The FirstInstance parameter must start at a value of one (1) onwards. - Multiple sub-sheets may be referenced by a single sheet symbol. Separate each filename by a semi-colon in the Filename field. With the effective use of off-sheet connectors placed on the sub-sheets, you can effectively spread a section of your design over multiple sheets, treated as though they were one giant (flat) sheet. Note, however, that use of off-sheet connectors is only possible for sheets referenced by the same sheet symbol.