Using a Standalone License
Contents
Installation
Main article: Installing CircuitStudio
CircuitStudio is installed by the CircuitStudio Installer. This wizard-based installer streamlines the initial installation process while letting you choose the initial 'flavor' of the installation in terms of installed functionality.
Once the software is installed, you are ready configure the license. There are two types of licenses available:
- Trial license (included in Trial installations)
- Purchased standalone license
Trial Standalone License
The Trial version of CircuitStudio is a fully-functional version that lasts for 30 days. To download your CircuitStudio trial, follow the install CircuitStudio link. Once the software has been installed, you are walked through the process of making an account and accessing a license using the CircuitStudio Installer.
Accessing Your Trial License
After launching a fresh installation of CircuitStudio, you are prompted to enter your information in order to access your trial license and start your 30-day free trial.

Licensing information is sent to the entered email address.
After selecting the checkbox and clicking Get My Free Trial, you are directed to a thank you screen with a Sign In button. Once you receive your licensing information via email, that information can be accessed from the Sign In page. The information email typically arrives within 15 minutes of requesting a free trial but may take longer.
When the registration email has arrived, click the Activate Your Account button.
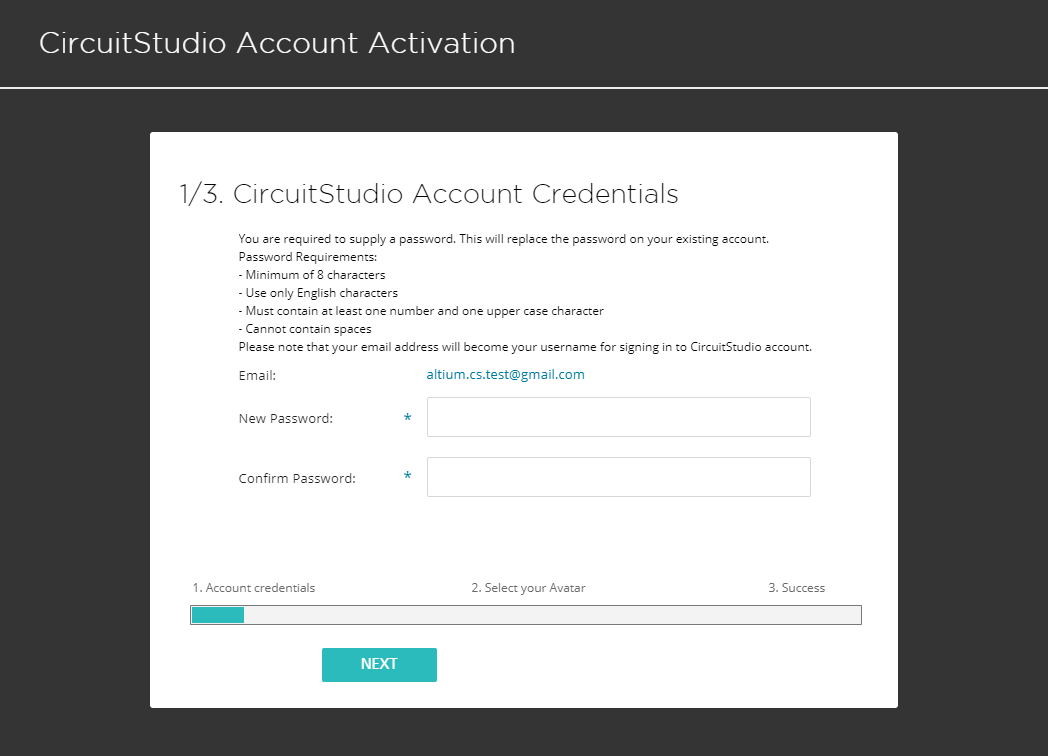
Users are then prompted to create a password for their account, which is tied to the entered email. The password must contain at least eight characters, use only English characters, and contain at least one number and one upper case character. The password cannot contain spaces.
After a password has been successfully chosen, click Next to select an avatar to be associated for use with the account. The avatar is displayed with the user's account information within CircuitStudio and the online community forums. Users may later change their avatar or upload a photo for their profile by visiting the My Account » Edit Account page page under the CircuitStudio Home page. After selecting an avatar to be used as a profile picture for the new account, click Next.
![]()
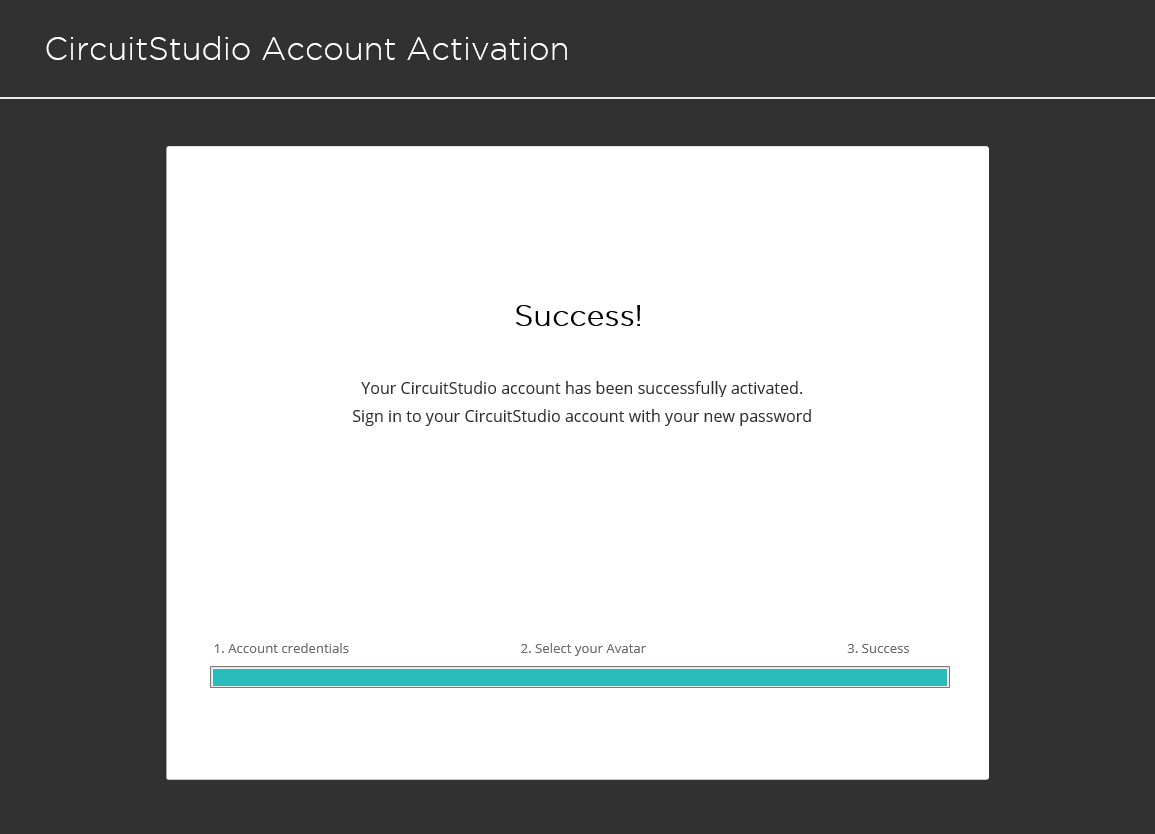
The final page of the installation confirms that the entered information has been associated with the user's new trial account. Users can now return to CircuitStudio and use the entered password to access their trial accounts.
Click the Sign in link next to Quicklinks on the My Account » Licenses page to open the Account Sign In dialog.
You can enable the Remember me checkbox to have the system automatically fill in your email whenever this dialog is accessed. You will always need to enter your password.
The I have read and understand the warning checkbox must be enabled before you can sign in. Checking this box means you understand that information about the hardware used to run CircuitStudio may be gathered as part of CircuitStudio's use.
Click Sign In to continue and begin your 30-day CircuitStudio free trial.
The User name is the email used to register the trial account. Enter the password chosen below.
Licensing information is automatically included with a trial subscription and no extra steps are needed.
Purchasing a Standalone License
A purchased license gives on-going access to all of CircuitStudio's powerful design capabilities. CircuitStudio is licensed through a traditional Standalone licensing model, where each user requires a license (issued as an .alf licensing file), which is stored on the end user’s computer. It is possible to move the license to another computer (in accordance with the EULA) for use by the same end user. The licensing file can be saved, copied, and backed-up as required.
As a licensed user you also have access to Subscription, which ensures that your tools are always up-to-date. With Altium Subscription, your updates and upgrades for CircuitStudio are delivered directly inside the software and downloaded as soon as they become available. Immediate access to new updates allows you to take advantage of new capabilities, helping you stay ahead of your competition.
Purchasing Your Standalone License
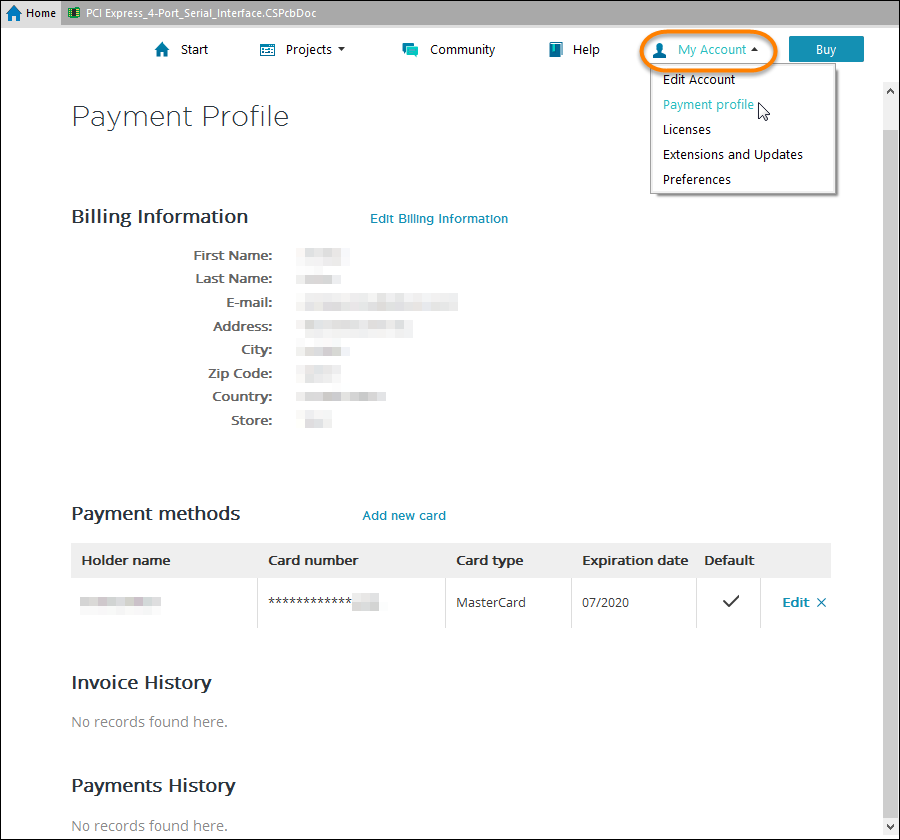
New licenses can be purchased directly through your CircuitStudio software. From the Payment profile section of the My Account pages, enter billing information. Once billing information and at least one payment method have been added, a ![]() button is available on any page of the Home navigation.
button is available on any page of the Home navigation.
Billing Information can be edited at any time.
A new standalone license can be purchased by clicking the ![]() button or by clicking the Buy New License link on the License section of the My Account pages.
button or by clicking the Buy New License link on the License section of the My Account pages.
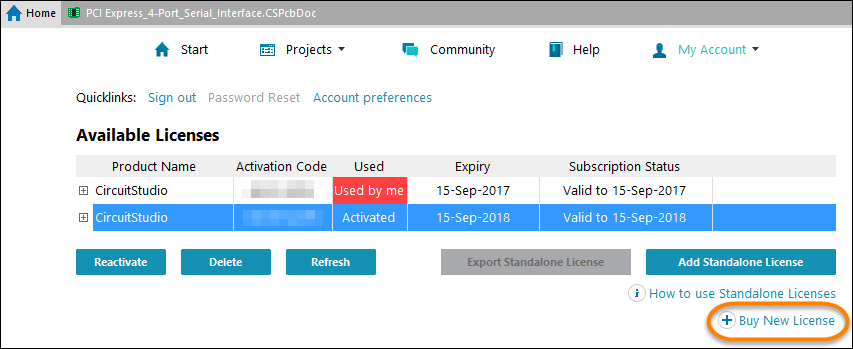
The Buy New License link is nearthe bottom-right of the page.
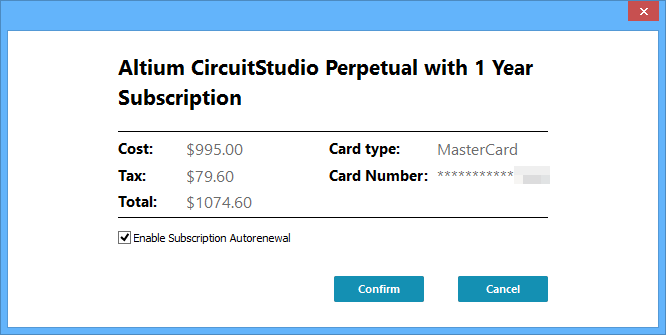
Both processes launch the same confirmation dialog. Subscription Autorenewal is enabled by default. Toggle the option on or off by selecting the checkbox at the bottom-left of the dialog. When you have finished reviewing your license purchase, click Confirm.
Accessing Your Purchased License
After purchasing your CircuitStudio license, you will receive an email from CircuitStudio Support within 24 hours (but typically sooner). This email contains important information about activating your account and accessing the license.
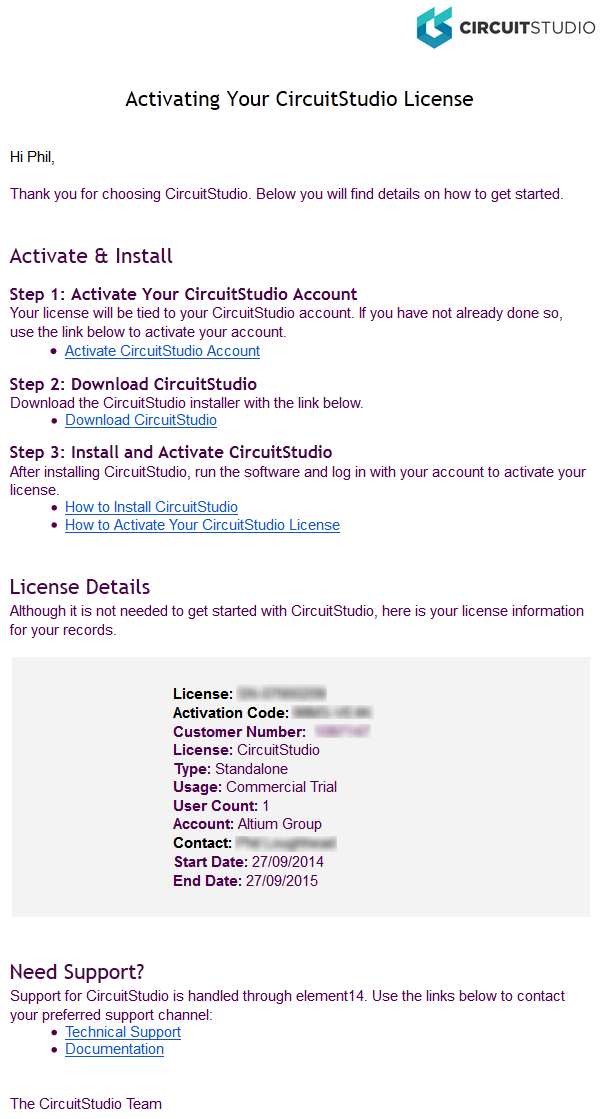
Response email that details the steps needed to activate your account, and install and activate CircuitStudio.
Work through the steps in the email, to:
- Activate your CircuitStudio account.
- Download CircuitStudio.
- Install CircuitStudio - run the downloaded executable (
CircuitStudioSetup.exe) then follow the instructions in the installer. Note that you must use the same Username and Password that you used when you activated your CircuitStudio account. - Activate CircuitStudio.
Adding a Standalone License
Run CircuitStudio once it is installed. It should automatically display the Home page at the My Account area, as shown below.
If not, click View | System | Start on the ribbon to display the Home page, then click on My Account and select Licenses from the drop-down menu.
Add the license file in the My Account area.
Use the supplied credentials (name, password) to sign in to your account, and then add the license file.
Click the Add standalone license file link to locate the ALF file you downloaded.
To add the license file:
- Click the Add standalone license file link, as shown above.
- The standard Windows Open dialog will appear, ready to browse to the license file. Typically the file will download into the default download folder used by your browser, such as
\Downloads. Browse to the location to where the license file was downloaded. - The file will have a name such as
CircuitStudio License XXXX-XXXX R10.alf, where XXXX-XXXX is an eight character code. Select it then click the Open button in the dialog to accept this file. - You will return to the My Account area of the Home page, which will display the license you selected in the Available Licenses list, as shown below.
Once you have added the license file, the software is ready to use.
Your installation of CircuitStudio is now licensed and ready for use!
Signing Into Your Account
Related article: Installing CircuitStudio
Now that your account has been activated, you can install and run CircuitStudio. When you do, it should automatically display the Home page at the My Account area, as shown below.
If not, click View | System | Start to display the Home page, then click My Account.
Click to sign in to your CircuitStudio account.
The Account Sign In dialog will appear. Enter your User name and Password. You do not have to enable the Remember or the Sign me in when I start CircuitStudio checkboxes to continue and license the software. Keep in mind you will not receive automatic notification of updates when you are not signed in.
Sign In to continue the software activation process.
Activating Your License
After signing in, you will return to the My Account area, ready to activate your license. Select the license then click the Activate link, as shown below. This writes the .alf file into a folder on your PC and activates your license of CircuitStudio.
Select and activate your license.
The process is now complete. The My Account area should look as shown below.
CircuitStudio is licensed and activated - you're ready to start designing!
Where To Next?